Having decided that we want to get some more power out of Ermy (We’ve come this far, why not start messing with her?) we did the basic homework of looking at turbo’s, rebuilding her engine and just generally having head work and such done. We decided in the end to go for a supercharger.
You can read about the decision taken in our last post, but the main issue, space, wasn’t really considered. And thats started to bite us in the backside right from the start:
The Manifolds In our last post, you can see our efforts at making our own manifolds. We gave up in the end, as people with vastly more skill were making kits.
Our kit from Edd Kellet at Garage 42 arrived inside of a week and its a well made. The welds are smooth and the final paintwork and fit is exceptional. Or it would be, if we had a normal MX5. The Exocet engine bay narrows towards the front creating a slightly pointier front profile, reduced by about the width of the headlights which are now held outboard. This means we loose a lot of engine bay space . The bonnet also sits a little lower down towards the engine, resulting in less height and clearance.
So, the first iteration of the kit didn’t fit.

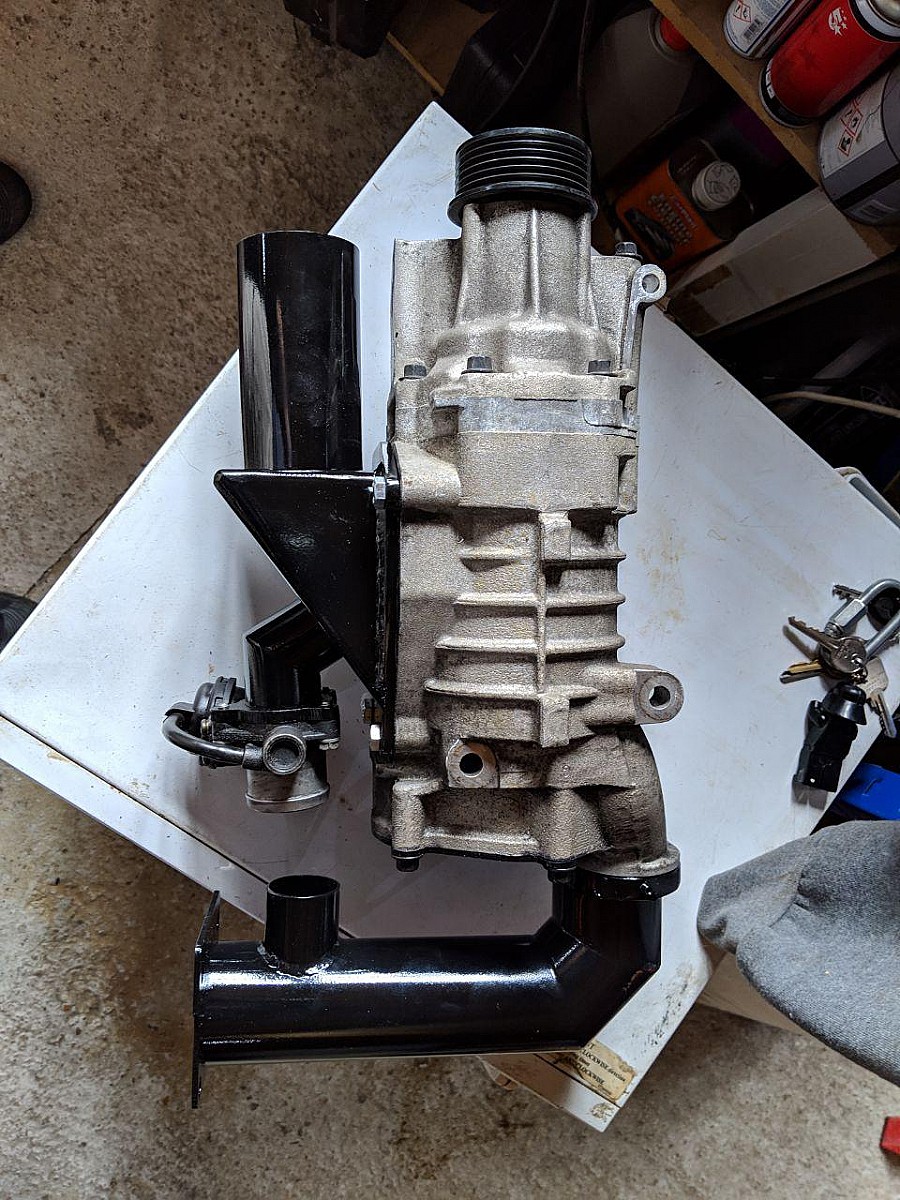
This is the Eaton M45 with the inlet and outlet manifolds attached. The Bypass valve is also in place, leaving a space for a 38mm hose to connect the bypass which lines up nicely. Except it wont fit.

It’s a little hard to see, but you can just about see the inlet coming out of the supercharger, and because of its length is fouling that orange cross brace. The solution? Make that shorter:

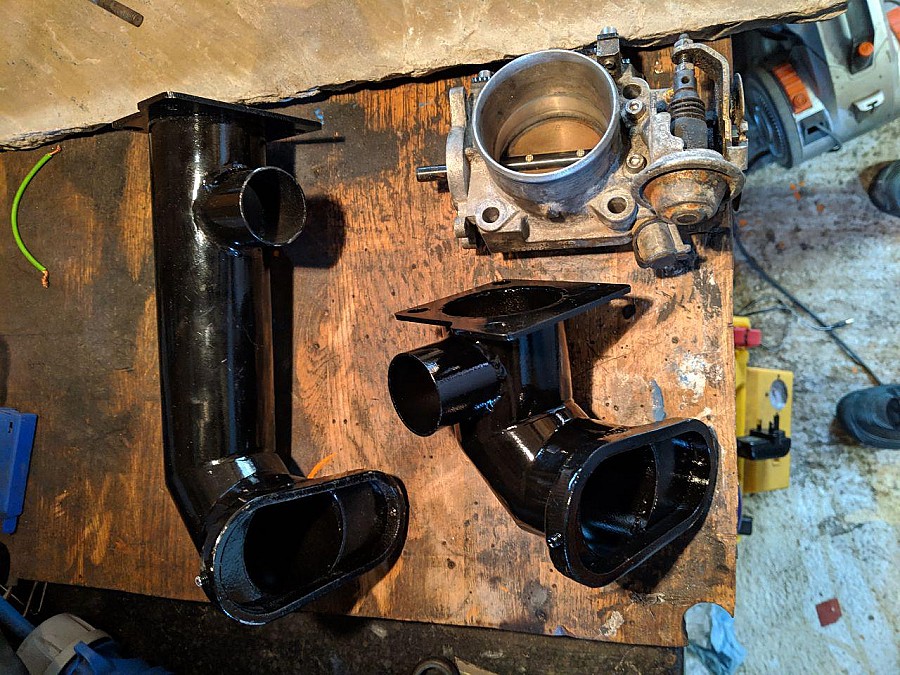
Thanks Edd. This revised, shortened inlet means that we have just enough space to fit the manifold into place. It’s not perfect, as the inlet manifold now fouls the bypass pipe slightly, so in future iterations of this a little more space will be needed. The pipe has also had to be angled down slightly, so that the silicon hose misses the cross brace.
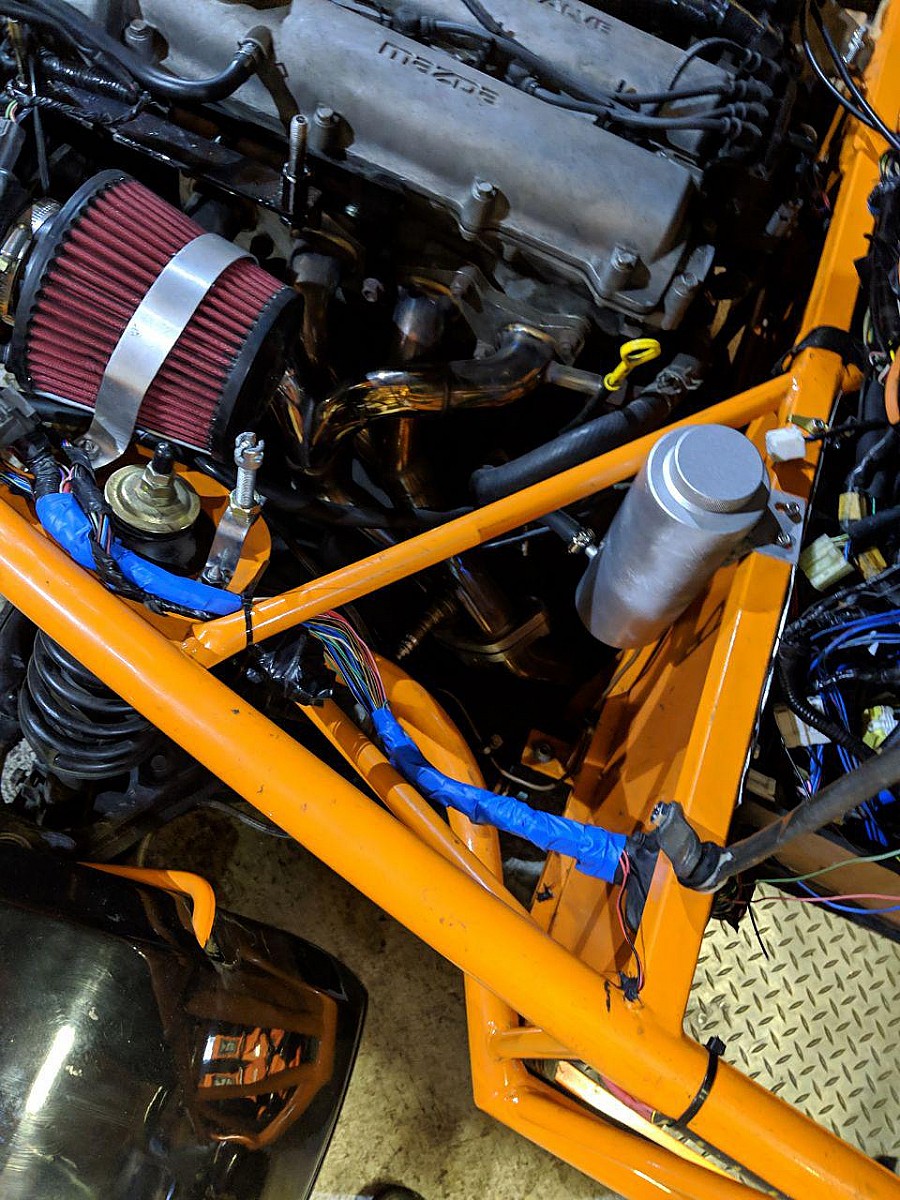
Speaking of more space, that expansion chamber has got to go. The space it is taking up is where our new (Much bigger) air filter will need to go.

We have replaced this with a generic metal expansion chamber. This has a taller, thinner profile leaving us with a bit of space to play with, but does have the downside of not being transparent, so if we are loosing coolant, we are less likely to see it. We have also taken out the ABS connectors which were clogging up the engine bay and generally looking messy. Over time we will remove all of the excess wiring, including audio and airbags, just to tidy up a bit.
Ive also just ordered some orange electrical tape, as that snazzy blue looks right out of place…..
Sadly we are fitting and removing the supercharger each time to keep Ermy on the road during this process, so I don’t have a photo of the last fit with everything in place, but here are the supercharger and throttle body in place.

Belt tensioners
These came with the kit from Edd, or at least, the metal plate did. Tensioner pulleys themselves need to be purchased separately. Standard MX5 Mk2 pulleys work absolutely fine. Just make sure to buy the pulley, not the sprung tensioner as tension is obtained manually as opposed to via the spring.

Again some custom work was needed. The tensioner plate usually bolts to the power steering pump, which we no longer have. The mounting brackets for the pump are still there though, so we bolted through this. An off the shelf 4 ribbed V belt has been measured using a bit of string around the pulleys (1200mm) and will be installed to run the supercharger.
Intercooler
Some people have suggested that we don’t need an intercooler as the M45 doesn’t create high enough pressure to heat the air up all that much. Other people point out that you get more bang for ya buck if you have colder air. Frankly, in for a penny, in for another £100 and some brackets….
Again space is an issue. The intercooler needs to be in front of the original radiator, or somewhere else so that we don’t just heat up the air we are trying to cool. Some people have mounted the intercooler on top of the engine, using a scoop in the bonnet to fire cold air over the intercooler. As our bonnet basically touches the engine, this is a no go for us unless we fabricate a super low profile curved intercooler that sticks to the bonnet. This seems excessive.

Fortunately, there is space in front of the bonnet for a narrow and tall intercooler. A bit of custom bracket work was made, mounting to the existing radiator brackets to hold it in place.

There is just enough clearance between the chassis and the bonnet to run some 2” silicon hosing, or to get some oval hosing. Ignore the intercooler that is shown there. This side inlet and outlet arrangement for the pipes doesn’t quite fit, so a new, top loading intercooler is on order. Photos of that once we know it fits….
ECU’s
We’re using a Motorsport Electronics ME221 Plug and Play ECU. Or at least, it’s meant to be Plug and Play.
Ours was the latest version, and ME have chosen to upgrade the MAP sensor onboard, but not the firmware pressures. So the car started, but the MAP sensor was reading pressures of between 60 and 100. This meant the engine was spluttering, revving up from 400 to 1200 and then dying off again. When the MAP sensor was disconnected, the engine ran, but totally failed to accelerate in a smooth way.
A couple of emails to ME and we think we have a solution, just change the settings to recognise the new MAP semsor, but at the moment we haven’t braved a second installation.
So we aren’t quite there yet, but we can see progress!